Sunday, December 31, 2006

Holiday Knitting

It's been a very busy Christmas season, and I've been getting a little knitting done while visiting, etc. I found 3/4 of a pair of socks that I went ahead and finished. You can see photos which show more detail on all of these by clicking here.


The pattern is Pat's Almost Serious Socks, which I got from Patternworks some time ago. It was free with a yarn purchase, and the original pair was my very first pair of socks. It has an easy lace pattern, and was meant to be done in a cotton yarn with gold and silver carrying thread for the heels and toes. This is a nice wool from Bergere de France, and for some reason I had done the first sock, and had the second one done about halfway down the heel flap, then stopped cold for about 5 years I think. Whatever. Anyway, it seems like sock time again, so I finished them, and then began a pair of quickies from an old favorite pattern called Fundamental Socks. It's in the Spin Off Socks book. It's just a plain ribbed sock done in a worsted weight yarn, but you put wooly nylon in the heel and sole. It's a nice technique which really adds to the durability of the socks. They were designed as work socks, and they are nice. Here's a picture of the cuff so far, with the Peep looking on.


I also did gauge swatches for the Bendigo Cabled Cardigan, and started it as well. Here's my progress on one side of the front, so far.


I like this pattern very much. It doesn't come with a chart, so I made my own after doing one full repeat with the written instructions. After that, and making the chart, it's almost memorized anyway. It's not a really complicated pattern, but interesting enough to make for good knitting, and I really like the color and the yarn itself.

I also have photos of the Fake-A-Gamo bag that is all knitted, and now just needs to be assembled. I haven't quite found the right lining for it, which is going to be important, as it will show through the fairly large holes in the pattern.


And here's a close up of the stitch pattern.


Hope you've all had a great holiday season, and a little down time to spend with family and friends. It's been very nice here, but today we are suddenly buried under snow, which makes a few last visits very difficult, if not impossible.

Buried Under the White Stuff


Yesterday and the preveious days, it rained, but today we finally got it. Not exactly what I was hoping for, or at least not quite yet.


You can see how deep it is on the deck railings.


The poor birds empty the feeders about as fast as I can fill them.

As always, larger versions of the photos at Pbase.

Sunday, December 24, 2006

Bendigo Wool is Here

From Yarn


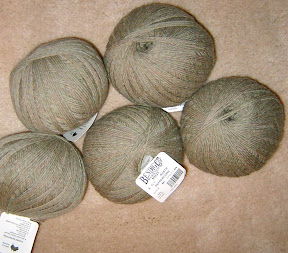
My package of Australian wool came the 23rd, the last package before Christmas, and just for me! Bendigo didn't break their record, but it was a very respectable 12 day turnaround, so I'm pleased. I think it's a lovely color, (which you can see more clearly here) and even though my choices on the order form were Balls or Cones, I was a little surprised by the balls, as I guess I'd always had Skeins before, and then wound them into balls myself. They don't seem to offer that anymore. It used to be $1 more to have them wound for you, and I don't mind doing it myself, even though I don't have a ball-winder, just a nice swift. It's kind of relaxing, and I love to get my hands on the yarn. You get a real feel for it by doing the winding yourself, too.

I also got 2 patterns from them, and I may be going to use the cabled cardigan pattern from them. It looks very nice. I need to swatch a little first.

I finished all the knitting for the Fake-a-gamo bag last night, and blocked it. It looks so much better after blocking. Not even like the same stitch pattern, as the triangles all move into place rather than being lumpy. Now, all I have to do is sew it together and make the lining, which will be a little more complicated than the instructions. I like pockets inside my purses, and I also want to use some stiffening, so I will probably do a double lining, and put the interfacing in between layers. There are so many holes in the stitch pattern that whatever's next to it will show right through. The little curlicues at the bottom were so fun to do, and are really silly, but very cute. Pictures soon, I hope.

I'm off to pick up my sister at the bus depot, where United Airlines will finally get her from Denver to here. Fly United, ride the bus for 8 hours, after spending a day and a night at the airport.... Oh well, she was only supposed to be here yesterday afternoon. They promised her their next available flight otherwise, on Monday afternoon! So, our Christmas celebration will be slightly postponed.

Hope you are all enjoying whatever you are doing this holiday weekend! We are!

Thursday, December 21, 2006

Vogue 8323


This is a first try on Vogue 8323, a nice knit top pattern. I used View A, with the crossover neckline, and added sleeves. I was planning to do long sleeves, but I only had enough fabric to do 3/4 sleeves. I altered the pattern before I began, but I will be doing a few things to it before I make it again. I do think I will make it again, as I like the style. It will be better in a beefier knit as well. You can see the photo larger here, and a sideview here.

It's been a long time since I made a Vogue knit top, and I must say, the instructions were particularly bad. They say the pattern is for Moderate Stretch Knits Only, and then on the View C instructions, they say, "If using a knit fabric...." What did they expect you to use? They also mention a serger only in passing, after instructing you in each step to do double-stitched seams. That technique is from the dawn of knit fabrics, if I recall correctly. I certainly haven't seen that anywhere for years. They really could stand to update their cut-and-paste library of instructional paragraphs.

I've been working on Christmas presents some, and only have one more thing to finish, which shouldn't be too difficult, I hope. Mainly, I have to find my instructions for a nice, twisted cord. I used some from an old copy of Piecework magazine once, and I liked the results.

I have stalled a little on the Marfy dress, as things have just overrun me, and I need time to decide whether I really like the plaid chiffon with the matelasslé. I think it should be nice, but then I worry.

I have begun again on the Fake-a-gamo (Ferragamo knock-off) bag. I was about 3/4 done with the first side, and started to kind of dislike it, so I quit for a while. I finished it the other night, making a few changes to the very top section, and I really think it's going to be neat. I'm about half-way through the second side now, so I'm hoping it will finish quickly. The photo on the left is the original, with the wonderful, yet difficult to replicate, wicker top. The photo on the right is the copy, and mine will be very similar, although more like the original in color. You can get the pattern at KnitLit.

Tuesday, December 12, 2006

Chiffon is here!

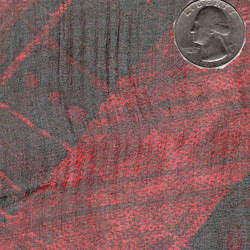
When I ordered the plaid chiffon for my Dressy Dress last Monday, I was slightly resigned to the idea that it might not come very quickly. Fashion Fabrics Club is not always the quickest online fabric source, but they vary pretty widely, so you never know. Well, the chiffon came yesterday, and I think I like it with the matelasse. One week from ordering to holding it in my hot little hand. Pretty good, I'd say.

I celebrated by ordering yarn and two patterns last night from Bendigo Woolen Mills. I thought I knew exactly what kind of sweater I wanted, but now I'm not so sure. My original plan was a cabled cardigan, and I still want one, but maybe in a lighter weight. Actually, all my original plans for this order kind of went out the window. I was set on Colonial yarn, which is a cabled wool, and makes for great stitch definition. I used it for The Red Cardigan, and it was great to knit with, and has held up beautifully.


You can see better quality photos here.

Unfortunately, I fell in love with a color which is only available in their Rustic range, also wool, but not cabled. I've used Rustic before, as well as Colonial, and it's very nice, but it's not Colonial. Rustic only comes in 8 & 12 ply (nominally DK & Chunky/Aran), while Colonial comes in 5 & 8 ply(Sport/Fingering & DK). In my opinion though, Rustic has much the best colors. I have ordered #951, Peppercorn, which is a blend of sage and pale teal with just a few reddish brown fibers mixed in. It's a complex blend, and the Colonial colors are much simpler. They have some lovely ones, though. I'm certainly not affiliated with Bendigo, but if you like yarn, it's worthwhile to email them and ask for a color card, as they have a lot of different yarns, and their prices are extremely reasonable. Hard to believe they don't have a website at all, but their service is great. They're at order@bendigowoollenmills.com.au.

Wednesday, December 06, 2006

Many, Many Things, None of Them Fiber-Related


From Inbox

It's been quite the day, or two days, actually.

Yesterday I was basically gone all day from about noon until after 8pm. This is not conducive to getting to the things that I want to do, since there's always about so much time that's taken up by things I have to do, and there was barely time for that!

Today was rather similar, although I was at home more. It was a beautiful day today. Over 60 degrees, so I had planned to fill the fish ponds, which lose quite a bit to evaporation during very cold weather. The level falls until it's warm enough to fill them easily. It was a good day for this, but I ended up having to clean one filter, and rescue a smallish fish that was trying to swim up the tubing to the pump, and then got stuck! He seems to be fine, although I'm not going to believe that he's really okay for at least a few days anyway. Fish who seem fine after some weird adventure often suddenly die a few days later.

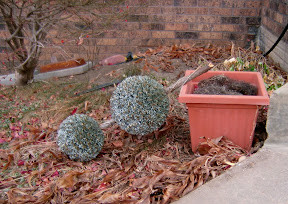
I also did a bunch of yard cleanup, and among other things, disposed of a topiary tree that seems to have met either a crabby woodpecker, or a Lilliputian Lumberjack.
From 12-5-06

I honestly don't know what happened to this, but I thought it was really funny. It's time for something new, anyway. I took this at the same time as the sunset photo. It was just really beautiful, and I was surprised it even looked anything like it really did, because sunset photos are usually very disappointing. They're like whale photos. It's unbelievable that a photo of a whale, the largest thing on earth looks like absolutely nothing, but it always does.

Yarnish Delight

From 12-5-06

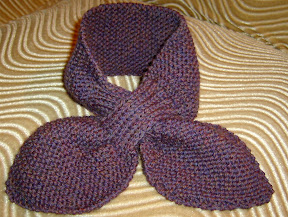
I finished this quick little scarf Monday night. I think it's pretty cute, and for anyone with a cold neck, it's very nice. I like it worn both straight, as shown, and also with the "knot" at the side. The pattern is from Katherine Burgess, and is a free download. It's a rather old-fashioned item, but I think it's very nice, and after all, Vintage is In!


From 12-5-06

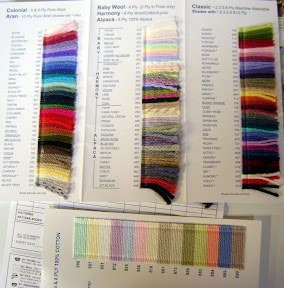
I ordered a new color card and price list from Bendigo Wools (of Bendigo, Australia) just a couple days ago, and here it came yesterday! They don't have a website, you just have to email them, and call a toll-free number to order. They hold the record for fastest service ever for a yarn order, from anywhere, to me. (I once got a yarn order which came from Australia, in 3 days!) I was pleased to get the color card, as I always liked their yarn, and they're very reasonably priced. I really like one of their colors in the Rustic line (which is on the back of the card shown) and will probably order some for a cardigan I have in mind. I wish the color was available in the Colonial line, as I like the cabled construction of the yarn. It gives such wonderful stitch definition and durability, but I'm afraid the color will trump everything. I have my heart set on a cabled cardigan, although I'm not quite settled on the pattern yet.

Friday, December 01, 2006

A Dressy Dress

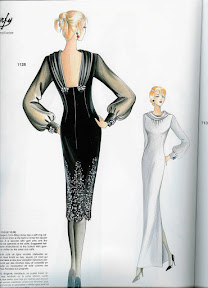
Well, I can't remember the last time I made a really dressy dress. I just don't wear them very much. I have a tendency to wear separates, or more casual things. I just fell in love with this Marfy pattern (#1128) though, and decided that I had to try it in the shorter length. I think I can get some good out of it during the holiday season this year.
From Patterns


I altered the pattern yesterday, doing a FBA and lengthening the dress 2". The sleeve length looks as if it may be fine, although I'll check them again with the dress on before I cut out the chiffon, which I don't have yet anyway. I'm using a chocolate poly matelasse that's really pretty nice. I cut it out and basted it all together (except the sleeves) tonight and tried it on. I realized that I forgot to fold out some of the length above the bust, but with this design, I can rather easily take a much deeper shoulder seam, and I'm not sure I'll even need to deepen the armscyes. I'll see. It's amazing how much difference it makes in the fit. Suddenly everything just slides right into place. Why I couldn't remember to do it first, I don't know, but perhaps I need to put up a poster with a list of the Required Alterations so that I don't have to rely on my memory. I was so worried about ruining the shaping of the pattern while doing the FBA that I think I just heaved a sigh of relief when it was done, seemingly without problems, and promptly forgot everything else I would normally do.

I am thinking of a plaid printed silk chiffon for the collar and sleeves.
From Fabric


I think with the plain, very dark brown for the dress itself, even with the matelasse texture, this might be a nice contrast.

It's so cold here now, 10 degrees as I write, that I had to make myself try on the dress, as it's not a warm dress. That may be something against it for this season. Well, either way, it will be done and ready to go when I want it.

Sunday, November 26, 2006

Burda WOF Skirt


I finished the skirt (#103)I've been working on from Burda World of Fashion's August, 2006 issue. I used a corduroy from my inventory, in a mottled oatmeal color. I had to lift the back at the top, about 3/4" because of flat seat, but I think the fit turned out pretty well. I like this skirt a lot. It feels very "girly" to wear, and yet it isn't too frou-frou. I really think I might make it again.

I used Ann Rowley's suggestion to put the zipper in one of the side-back seams rather than in the angled hip seam, and it worked very well. You definitely need some type of mark on the inside at CF, as there are really no obvious "markers" to tell you if you have it on straight.

I like it with this Marfy jacket as well, and the little knitted shell has been a favorite for years. Here's a side-view, which shows the flared back panels, and you can see more detail here.

From Burda WOF (8-...

Monday, November 20, 2006

Tranquil Lagoon Pullover


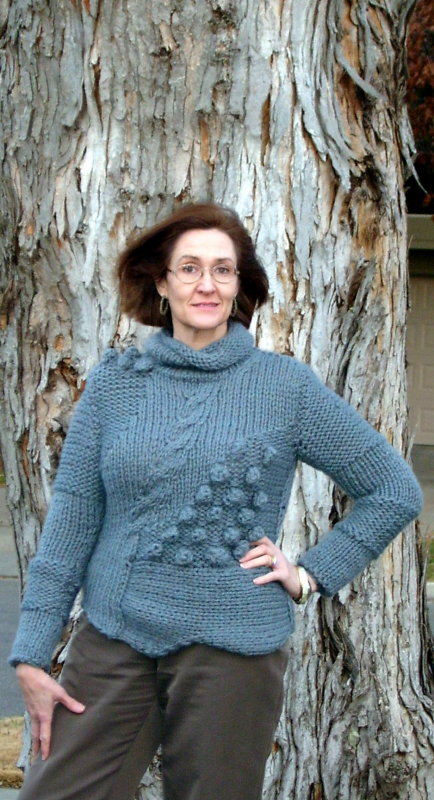
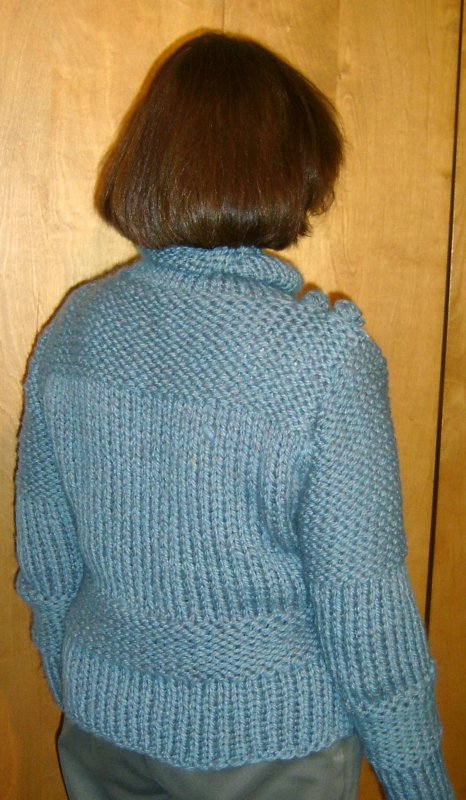
Here's my new "what shall I wear on such a cold day?" sweater. It's another from the Austermann Stricktrends #27 book. I used elann.com's Peruvian Highland Chunky yarn in Tranquil Lagoon. It's a much subtler color blend than shows up in the pictures. It took me 14 skeins rather than the 10 I originally estimated from the yarn requirements given. Since I substituted a different yarn, I was not surprised that it took a little more. It's so very nice and snuggly that I am really pleased that I made it. It is very unusual, as was the pink tasseled pullover from the same book that I made this fall also, but when they're in such a large gauge, you can knit them up so quickly that it isn't an enormous time commitment for a possibly "weird" sweater, and so it's easy to take the plunge. I am really glad I did.

I like the back almost as well as the front. It's just a very nice proportion of stockinette to reverse stockinette.


I'm about to go see if I can cut and stitch the lining for the Burda WOF skirt from the August, 2006 issue that I'm finally making up. It's going well, and I hope to get it done this week. I have a small craft project that I committed to helping with though, that may have to come first. Just when I'm all in the mood for my skirt, too. Oh well, that's what I get for volunteering.

Wednesday, November 15, 2006

Shirtmaking Information


This tutorial/compilation was originally posted on Sewing World beginning on September 8, 2004. Luckily, I saved a copy. I have removed all the posts that were not mine, and so if it seems that I’m answering some questions that aren’t asked, be assured they were asked, just not posted here.

Several people have very kindly asked for my ideas on men's shirts, as I've made a lot of them. I thought of calling it Everything You Wanted to Know About Shirts, But Were Afraid I Might Tell You!

To start with, here are a couple of links.
This one is a review that I did.
Here is a link to photos of shirts I've made.
(If you use this photo link, or click on any of the images here, it will take you to my photo site, where you can view much enlarged versions of the photos, for more detail.)


For a first shirt, I think one thing that's very helpful is to use a fabric with a pattern of woven (not printed) stripes or plaid. This will give you nice grainlines to use as sewing guides all the way through. Matching stripes is very easy, as they only have to line up really on the pockets. You will of course cut striped yokes, cuffs and collar with the stripes horizontal, and plaid fabrics with the yokes (and possibly pockets) on the bias. When matching plaids, I use the point of the armscye seam as my matchpoint, which corresponds to the corner of the sleeve.


A lot of the finished look of the shirt begins with the layout.

Make sure you have your fabric design placed so it will be flattering. Either center a plaid line on the back or have one on each side, equidistant from the center. If you don't do this, it will look crooked. Check to see whether your fabric is thin enough that you'll see any doubled layers through it. If for example, the stripes on the under yoke will show through, they must either match exactly with the outer layer, or you can use a plain fabric for it. I've also used a thinner fabric for the inner yoke when using a heavy wool shirting.

When cutting out your upper collar make sure there will be a nice edge to the collar. You can see through the pattern to where the seamline will be. Make sure you have a stripe line at the edge or near it. The cuffs are the same way. For the cuffs, I like to cut them the long way, with the fold at the buttonhole edge, and seams on the other 3 sides. The buttonhole edge is the important one. People notice it and the collar first on a shirt, and if it's worn with a suit and tie, that may be all they really see. Putting the fold on that edge will give you a very flat edge, and make those 2 corners easier to turn, as there's only 1/2 as much bulk. Also, there's no seam allowance to bother your buttonhole. I cut my cuffs somewhat wider than I need, and cut the interfacing the finished cuff size. When I'm ready to fuse my interfacing, I lay the 2 cuff pieces out and make sure I have a matched pair with stripes or design the same way on each. Since I cut them a little wider than I needed, I can fiddle with the placement, and have plenty of room. I fuse the interfacing (I use Pellon's ShirTailor throughout) (updated on 11-3-06 to add that I’m now using a Brooks-Bros.-type interfacing called Pro-Woven Fusible) and then can use the edge of the interfacing as my stitching guide, always making sure to go right along a stripe or plaid line. It's much more important to have the cuff follow the fabric pattern than to have an exact seam allowance. You will trim your SA anyway. This works really well, as the fabric pattern is woven in, so you know it's perfectly on grain.

Collars are treated similarly, although I fuse the entire collar and undercollar, including the SAs. I also fuse both inner and outer stands. This allows me to trim very closely without worrying about raveling. I often make the collar first of all, as they're interesting, and then they're ready when I need them. I use KwikSew patterns for shirts, so they have 1/4" seam allowances built in, but if your pattern has wider allowances, be sure to trim at least the collar stand and shirt neckline to 1/4" allowances, and your placement will be much easier. Always remember that you are matching stitching line to stitching line, and pay no attention to your cut edges. The smaller the seam allowance, the easier this is.

Your upper and under collar pieces should be separate, and different. The undercollar is slightly smaller since the uppercollar will have a longer distance to travel from the stand over the curve to the collar edge. The smaller undercollar will help set that curve permanently. Sew them together, stretching the undercollar to fit the upper. You can either take one stitch across the corner or pivot at the corners, but whatever works best for you is what you should do. Turn your collar gently without worrying too much about the points right now. You just want to see if the ends match. They must look as if the fabric pattern is continuous from edge to edge. If one side is slightly longer or shorter, go back and change them to match. They don't have to perfectly match the pattern piece shape, just each other. In fact, you can draw any point shape you want. As long as you leave the edge which meets the stand alone, the rest is pure design opportunity. Also, check the outer collar edge and make sure you're on a stripe if you need to be, or at least that it's consistent throughout. Once you get them to match and everything looks fine, press the seams flat, and I trim pretty closely using a pinking shears. At the corners, take one snip across, then sort of tapered toward the corner, then do the rest. Then, press the seams open on a point presser, using quite a bit of steam. Now turn your collar for real. Push the points out very gently with your finger, then take a large needle and pull the points out carefully to the shape you want. It helps to do them at the same time, a little on one, then the other, as you don't want to over-turn them. Once you're done, hold the collar in position again, and make sure you like the way it looks. This is the focal point of your shirt. Now is the time to understitch if you want to. I used to all the time, now I don't so much. It depends on the fabric. Really nice cotton doesn't need it as much. Heavier fabrics need it more. If your undercollar acts like it wants to roll to the outside, understitch it.

Now, look at your collar. The undercollar should not meet the uppercollar at the cut edge. Do not trim them to match. Instead, pull the undercollar to match the uppercollar, and pin them. See what a nice roll your collar now has. Baste this edge.

Topstitch and or edgestitch next. I like to use the blindhem foot as it has a little lip I can adjust to run right along the edge of the collar, and can adjust my needle position to the width I want. Take a threaded hand needle with no knot and put it through the first collar point, beyond where you will stitch. This will give you a handle to begin stitching cleanly after you pivot. When you stop, be sure your needle is all the way down and on its way back up before you pivot, or you will have a skipped stitch (which you can fix with a hand stitch if necessary, so don't panic.) Once you have turned the first corner, remove the needle and thread from the point, and put it in the other point. I use this technique on cuff corners too. For cuffs, begin your topstitching very near the inner corner on the button side of the cuff, as this area will not show when the cuff is buttoned. Now is the time to monogram the collar if you plan to.


I like a folded, cut-on front placket. Add a 3 5/8" extension from the CF of the shirt. On the button side, cut off 1/2" of this. On the buttonhole side, fold under 1 1/8" and press. Fold under 1 1/8" again and press. Topstitch this edge. This is the outer edge of your placket. Fold under 1 1/8" a third time and press. Topstitch this edge. Unfold, and press. This is the inner side of the placket, and it now looks like a stitched on placket. This is self-interfaced, and the pattern matches! This is one of those times when you can fudge a little if you need to, to make your fabric pattern end up in a good spot. Stripes or plaid make the folding extremely easy also, as there is no need to measure all along, just follow the line. If you do measure, and don't follow the line, it will look crooked. Since the lines are on grain, you want to follow them anyway. The button side is folded only twice, and stitched along the edge. The buttons will hold it down, along with the collarstand and hem.


I know that yoke depth is a debated point. Shallow yokes are touted by some authorities, but since the yoke is the only "fitting" opportunity you really have with a shirt, I think it's not quite as one-size-fits-all as you might think. The yoke is what the rest of the shirt depends upon, literally. Most men's shirt patterns also seem to have really dropped shoulders, which I don't like too well. I narrow the width of the yoke if necessary by making tucks in the interior of it rather than by cutting a smaller size. This preserves the armscye of the size you want. You can't go clear to the shoulder point probably, as it's a flat, shirt sleeve, not a set-in sleeve, but you can get fairly close. All this just depends on what look you want.

I think the depth of the yoke should be related to the back shape of the wearer. A shallow yoke that stops above the forward curve of the spine will make the wearer look stoop-shouldered. With very erect posture and a slimmish build, you can have a very shallow yoke and it will look fine. With very broad shoulders and a lot of body depth, a shallow yoke will look like it is perched on top of the shoulders almost like a toy shirt. The back of the shirt should hang fairly straight from the bottom of the yoke, so see where that is. It should look elegantly graceful, with a nice drape to the back.

Men's dress shirts are not particularly fitted through the body, and in my opinion, it can be a very sexy look. Much more so than a very fitted silhouette. Watch the movie Working Girl and notice while Harrison Ford works in shirt-sleeves, or when he changes into a fresh shirt. This is not a skimpy garment, but doesn't it look rich? Cary Grant also, or any of the classic Hollywood stars wore classic shirts. Men's shirt styles do not change quickly. Traditional is just that.

For a fun detail on a striped fabric, try doing a CB seam on your yoke, and putting the straight grain at the shoulder yoke seamline rather than the back yoke seamline. This will turn your fabric enough that you will get a chevron seam at CB. When you do this, you need to be very sure that you match the stripes exactly, as this detail is a real eye-catcher, and it will be immediately obvious to everyone whether it's right or not. You can keep the yoke lining on the straight of grain for less bulk at the CB, or you can chevron it also. If you keep it on the straight, and it's thin enough to have show-through, you may want to use a plain fabric for the inner yoke.

David Coffin didn't write his book until I'd been making shirts for quite a few years, and I had pretty much settled on the techniques I like, but I did read it when it came out, and was especially interested to see that he credits quite a few ideas he uses to an OOP self-published book by Barbara Helyer called Sewing Magic. That's what I've used as my guide. It's been a while since I read his book, but mainly I remember that he's dead set against fusible interfacing. Also, that you must only use natural fibers. Well, I'd already broken most of his rules. I used mainly blends for years, as I was dead set against ironing. I will agree that the finest cottons and linens sew beautifully, but why not use the great techniques on lesser fibers too, and why not wait on the really expensive fabric until you've practiced a little. I also do not flat-fell seams. It never crossed my mind to do so, and I've always used KwikSew shirt patterns, which have 1/4" SA, so would be pretty tough to flat-fell. I sew the seam, serge the SAs together, and topstitch. I've never had a problem with raveling or anything. The SAs are narrow enough, you really don't notice them. If Pearle ever rolled up his sleeves, I guess I'd consider doing the sleeve seams, but that's about it.

As for fusible interfacing, I really think it's the only way to go if you want a really perfect, very crisp collar and cuffs. I agree that it would make the placket boardy, and probably stick out funny, and I don't add interfacing to the placket at all. You can starch shirt collars of course, but I have found that it's kind of hard on them, and the fabric will wear much faster.

I do not do a rolled hem. When I'm ready to hem, I pin the stand together as if buttoned, and hold the front opening to see if the front edges are exactly the same length. If not, I trim one, then serge the edge. I then turn up the hem the width of the serging and stitch, usually with a 3-step zigzag. This makes a flat edge, and no obvious line of stitch bulk. I then turn up again, and straight stitch. I do not press the hem up before I stitch, as I can manipulate it with my fingers as I stitch. This takes a little practice, but as you begin the curve up to the side seam, turn up the hem right at the side seam so the seams match, and see how much you must ease or stretch to reach that point. Do the same thing coming down the other side. You will be aiming for the straight grain parts to match perfectly when you get there.


The sleeve placket method I use isn't something I thought of; it just happened to be the method in the KS pattern I like best. The sleeve has a regular underarm seam, but also has a seam which goes from the placket to the point where the yoke joins the back. So it is a 2 piece sleeve. I've done the "move the sleeve seam to the back" thing on blouses I've made for myself, but I've used this shirt sleeve consistently on all men's shirts since I found it. It's just too easy not to. I took some photos of the pattern pieces, and also found a mostly unsewn shirt that I photographed. I probably cut it out and began it several years ago, then put it away for some reason and forgot about it. Luckily, it's still in style so I guess I should finish it. The collar and front plackets are done, and the stands and cuffs are fused. You can see that I cut my cuffs the long way, and fuse the outer half only.

I'm sure it would work to move the underarm seam to the placket seam. I believe there are instructions for this in one of the Palmer/Pletsch books, but you can easily do it by cutting your pattern where you want it, and taping the old seam line together. It might depend on the grainlines a little. The smaller, undersleeve piece on the pattern I use has the seamline slightly off grain. Not much, but enough to tell when I match plaids, etc.

I haven't seen the Margaret Islander videos, but have heard raves about her for a long time. I recently saw someone (can't remember the name) on Sew Much More who was doing shirts. Her big thing was tailor's tacks for marking, which worked very well. That, and just precision sewing.

I only use a smaller stitch length on the seam at the front curves of the stands. I've topstitched with 2.5 spi most of the time, but sometimes smaller, and I like the larger stitches unless the fabric is terribly fine. Pearle is very adamant that he doesn't wear blouses, he wears shirts. I got quite an education as to the difference, at least in his opinion when I first started making his shirts. So, most of the shirts I make are rather conservative in style and fit. Fabrics I thought looked fine were decisively dismissed, and he's not really into anything that might appear to be a dressmaker-type detail. I see a lot of those recently on men's shirts, at least in magazines. I do go slightly wild on buttons, but he seems to think that's okay, or maybe I'm not as wild as I think.


All striped or patterned shirts especially should have the cuffs cut lengthwise, so the pattern goes the right way. Why do I cut the cuff long and skinny? It's so I can have the fold at the buttonhole end. You get two beautiful corners that way (I do square-ended cuffs) and there's no seam allowance to get in the way of your buttonhole.

Here is my cuff method in detail. Cut your cuff lengthwise, as above. Interface the outer cuff half only. Match the outer cuff to the sleeve edge RST, making all necessary sleeve tucks. Stitch the outer cuff to the sleeve. Now fold the inner cuff around the sleeve so it forms a tube with the sleeve in the middle. Sew the button end of the cuff together. You will be able to see exactly where the cuff should end by where the sleeve is. You may want to roll the sleeve slightly out of the way after you mark where to stitch, before actually stitching. Now, resew each end of the outer-cuff-to-sleeve seam that you sewed first, but this time, sew through the inner cuff too, but leave several inches in the middle unsewn, so the outer cuff is attached to the sleeve all the way across, but the inner cuff is only attached at the ends of the seam. Trim now, except the unsewn inner cuff area. Turn the cuff right side out. Now, turn it inside out again, but do it by pulling the cuff through the unstitched area you left in the cuff-to-sleeve seam. With the inner and outer cuffs RST, you will sew the seam at the lower edge of the cuff. Trim, and turn back through the same unsewn area. Your cuff is now completely finished, except for a small area you may sew by hand, or baste and close with your topstitching. I can complete this operation while leaving only about 2" that will need to be closed.

These are some of the shirts I've made over the years. Pearle gets to choose the fabrics, and he has picked some that are wilder plaids than I would have ventured to choose for him, but he seems to find colors that are really great on him. The cranberry plaid shirt in the front is one of my favorites.

Saturday, November 11, 2006

An Alpaca Named Evita

From Alpaca11-06


We went to the Grand National Llama & Alpaca Show this morning. It's been here in Lincoln for the last 4 years at least, and it's so much fun to see the darling animals groomed to a fare-thee-well. Every year there are more fiber vendors as well, and that is quite the treat as well. As you can see, I managed to restrain myself admirably, to only 3 skeins of 100% Alpaca from an alpaca named Evita. It's handspun, and that's the reason for the varying texture, which is what caught my eye, and eventually made my decision for me.

I wore the pink sweater last night to dinner, and it was quite a success as well as being very comfy and warm. I've got a good start on the other Austermann pattern as well. I'm just up to the bobbles on the front, and I need to go look at my bobble instructions from the sweater with over 1000 bobbles that I did this summer. You'd think I could remember how, and I almost do, but I think I'd better just make sure.

Thursday, November 09, 2006

Bombola Pullover


Well, this was a very quick sweater to knit, and it was a fun pattern as well because of all the wild craziness going on in it. It certainly won't be a wear-it-everyday piece, but for the time invested, it is definitely worth it, and I think I'll enjoy wearing it. It's very cuddly/cozy and warm, so it should be perfect this winter. Perhaps even tomorrow, which is supposed to be quite chilly, on the way to cold.

Here's the back view, and another, clearer front shot.


This sweater was knitted on Size 17 (15mm) needles, the largest I've worked with, and they still seem pretty awkward even after all the practice. I have already begun another sweater with the same size needles, and from the same pattern book. In the previous post, there were so many helpful comments about which one I should make, that I took them to heart, and am doing both! I started on the bobble one (second photo in the last post) last night, and it seems more comfortable to knit so far. I'm not using the recommended yarn, but am using Elann's Peruvian Highland Chunky wool yarn in Tranquil Lagoon.

I'm knitting with 2 strands, as I would have done with the recommended yarn, so I think this should work well, and I love the color.

While I've been recuperating, slowly, I've also knitted a few Christmas gifts, so I won't post those, just in case.

Friday, November 03, 2006

Knitting Quandary


I saw this design at elann.com the other day, and it just intrigued me so much that I went ahead and ordered the yarn and the pattern book.

The package came today, and looking through the rest of the patterns in the book, I came across the one below, which I am almost tempted to make instead. It's not the same yarn, but the gauge is the same, and I think it would work. I just can't make up my mind.


This book has the most unusual patterns I've seen. Many of them involve both knitting and crochet, and even hairpin lace, and all in unique juxtapositions. The best ones, in my opinion, are not those shown in the preview on the elann site.

I assume that when I'm finally recovered from this respiratory thing, I'll be back to actual sewing, but for now, knitting seems to be about all I can handle. I've just committed to doing the SWAP contest again this year, so I hope I will soon feel up to planning, etc., as that's the part that is the most work, I think.

I posted a lot of Shirtmaking Information on Stitcher's Guild today that I'd put together some time ago. It was very flattering to think that people were interested in seeing it again. It was on Sewing World for quite a while, but that site seems to be permanently defunct now.

Sunday, October 29, 2006

Warm Hands


Since I've seen so many patterns for them lately, I've been thinking about making some knitted mitts. I think they'd be perfect for a particular Christmas gift, and I thought I'd better make a test pair to see how they are. They're really fast to do, and fun, kind of like the interesting part of a sock.


The pattern is called Fetching, and is from Knitty.com. I used Peruvian Highland Wool from elann.com, and it only took one ball to make the pair, with a little left over. I used Size 4 needles, though the pattern calls for Size 6. They took me just over a day to knit.

I'm still recuperating from this cold. I seem to have a lot more energy now, but I also have times when I'm suddenly just exhausted, so I suppose it will take a while to get back to normal. Tomorrow is the Mu Phi Fundraiser Boutique, so I'm excited about that, but I wish it was in another week or so instead of tomorrow.

Wednesday, October 25, 2006

Beading, Slowly


I've had a bad cold ever since Saturday night, and I just haven't felt like sewing or even knitting, really. So, I've been catching up on some reading, (poolside reading, if you know what I mean) looking at magazines and resting a lot. I finally felt like doing something, and decided to finish the beading on the scarves I hemmed for the Mu Phi Epsilon Boutique Fundraiser this Sunday. (About time, I guess.) Then I noticed a couple bracelets that were half-done in my beading things, and thought I'd work on them a little. Well, it went really well, and I finished them both last night! I don't know when I started on them, but it was over a year ago, not that there was any rush.... You can see more photos of them here.

The one you see above is a cuff bracelet with an armature underneath. You can see the edge of it here and there. I used an assortment of various beads and just piled them on. I think it's going to be fun to wear. If I were going to make another, it would definitely be narrower, as there was a lot of beading just to cover this, much less build it up and make it look somewhat interesting.

The one below is what I have seen called a Caterpillar Bracelet, and has a base of narrow cording doubled, stitched and knotted at one end with a loop at the other. It's beaded all over with loops of beads, and has a beaded ball on one end as a button to close with the loop. I'm quite pleased with it, and I can see wearing it quite a lot.

A Beaded Gift


The beautiful beaded stitch markers above are a gift from my sister! It was so exciting to get them. They're so lovely, and something I never would have gotten for myself. (I've been known to cut up McDonald's straws and use those for stitch markers, and they work very well, especially if you need a ton of them, right now. But, a thing of beauty, they're not.) I find myself just gazing at these and all their little details. The largest one is a lampwork bead, handmade by someone.

Saturday, October 21, 2006

Coat Photos


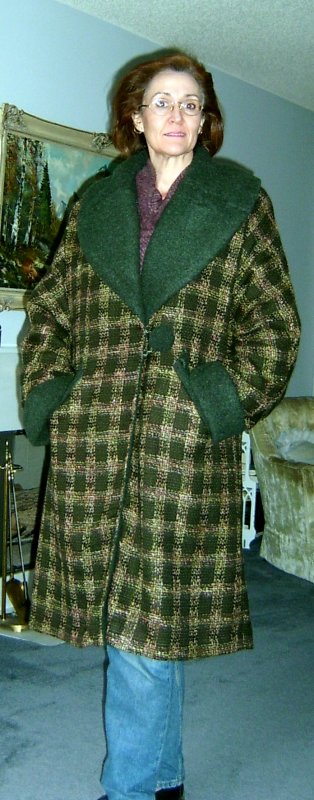
Well, as I said, I finished the Marfy #9621 coat on Thursday night, but only got to take photos this afternoon. You'll have to ignore the jeans and fleece top, which although extremely warm, isn't what I'd wear this coat with. I was afraid I'd miss the light again today.

I'm pretty pleased with this. It's very comfy, very warm (I tested it on the way to and from the Pati Palmer seminar today. It was snowing and sleeting!) and roomy enough to wear almost anything under. (In case you're wondering, I did not wear the fleece and jeans to the sewing seminar. I wore my Vogue bamboo print topstitched jacket.) I made full-length sleeves instead of the 3/4 sleeves shown in the illustration. I love 3/4 sleeves, but I also love warm arms, so I decided to be practical, and have warm arms.

As always, a Marfy pattern goes together beautifully. The unusual feature of this coat is the drawstring treatment in the collar. I don't know if I did it the way they had in mind, but I'm kind of pleased with it. It certainly makes for a very warm coat with the collar gathered and the ties tied. I used a fancy twisted cord as the drawstring. I also used it for the button loop. I used a 1 7/8" button covered in the lining fabric.

The plaid fabric is from JoAnn's, and the wool lining fleece is from Wazoodle.

You can see more photos and close ups here.

Friday, October 20, 2006

Coat is Done

Well, no photos yet, as it's late and dark, but I finished the coat tonight! I'm quite pleased with it, and I certainly have worked through some trials and tribulations, not the least of which is that my sewing machine died at about 2am Monday morning. Yes, my dear Elna 7000 just gave up. The flywheel suddenly was very stiff and I couldn't pick up the bobbin thread. I took it in on Monday, and just heard tonight that the hook is what's bound up. The repair guy has had solvent on it and is working it and thinks he might be able to get it loosened up enough to get it apart tomorrow to see whether the hook is okay. I hope so.

I ended up finishing on my good old Kenmore, the faithful backup machine. I'm so glad I've kept it in working order all these years. Every once in a while it's worth its weight in gold, or wool at least. I had no problems sewing, and the fact that I have a walking foot for this machine was a great help I think, as the layers were quite thick. This was because I decided to do a complete lining of the coat with the wool/acrylic bouclé fleece from Wazoodle. I was awfully worried about it at the beginning, but I think it was a fine choice, and the coat is all I'd hoped. It's very drapey, and cut large enough that even with a non-slick lining I have no trouble at all slipping it over other clothing, even sweaters. It's going to be extremely warm too.

I may wear it to the Pati Palmer seminar in Omaha tomorrow. It's supposed to be cold, and even colder for the second day on Saturday.

Saturday, October 14, 2006

Welt Pocket Test


This may not look too thrilling, but I'm pretty pleased with how this test pocket is going. The lips aren't actually sewn in yet, but I was going past the scanner, so I just took my chance so that you could see it.

The plaid will be on the straight-of-grain, and the pocket will be angled on the coat. It's the largest welt pocket I've ever made; about 6" long and over 1 1/2" wide so that the contrast fabric really shows up. It's a dark green, no matter what it may look like here. It's quite lofty, and I think it's going to be a great contrast fabric for this. I decided I had better make a sample pocket as I realize it's been quite some time since I actually did welt pockets. They're always kind of fun, though. It's just so exciting to see them begin to emerge during the pressing phase.

I'm going to finish my sample, and then stitch the darts on the coat fronts so that I can do the pockets. The pocket openings must line up exactly with the dart ends. Should be exciting, and I'll find out whether I laid out my fabric exactly symmetrically. It's more exciting than I'd planned, as I had to cut each front and back piece separately since the fabric wasn't quite wide enough to do them with the fabric folded.

Here's the pattern illustration again.

Friday, October 13, 2006

Instant Jacket


Here's my Instant Jacket! I feel like it was almost instant anyway. I fooled around and didn't stitch it together right away, but now it's done. As I said before, the yarn is from Wal-Mart; they're having a collection made for them in Turkey. It seems to be mostly your average discount type yarn, although almost all novelty types, but I fell in love with this. You can see a pretty good representation of the color in the photo below, at least on my monitor. This shows the shoulder seam on the left, and the edge of the garter stitch collar on the right.


I really like this little cardigan. I think because of the tweedy effect of the yarn, it has quite a fashionable look. I was so close to not-enough-yarn-to-finish that it was scary. I used every single scrap to finish up the collar, and ended up sewing up the seams with heavy thread. You're supposed to do a round of single crochet around the whole thing, but forget that; I was lucky to finish at all. I used beautiful gold crested buttons from Pam at Sew Exciting. I think they add quite a bit to it, and it will be fun and easy to change the buttons if I want a different look sometime. The buttonholes are simply enlarged stitches that I stitched around on the inside to keep them the size I wanted them.

The back neckline on this pattern has a tendency to stretch to a width much wider than is flattering. Instead of a stabilizer like twill tape or anything which might show, I used a doubled heavy thread (30wt. cotton) to stitch by hand along the edge to stabilize it and to pull it in to the measurement I wanted. In fact, I almost halved the original length, and it came in beautifully, with no gathers or anything. It's just that it's such large stitches that there's a lot of play in them. I think that sewing the collar on could have done the same thing, but I wanted to get it the right length before I stitched the collar.

I stitched the collar on by hand, with a doubled thread, holding the collar with the right side of the collar facing the inside of the jacket. After stitching, the collar then rolls beautifully to the outside in its proper position, rather than looking rather flat, which is what can happen.

I would recommend this pattern or something similar to anyone with a Bulky weight yarn for which they want a quickie project. Anything that knits at about 2 stitches/inch works, and the more interesting the yarn, the better.

You can see some more photos here.

Monday, October 09, 2006

Coat Fever


Here's the coat that I think may finally move me from the ranks of
Dying to Make a Coat,
to
Made a Coat.

It's Marfy 9621, and I have a lovely deep green woven that is almost like a flat-woven tweed, with bouclé plaid threads in pink, green, gold and a tiny bit of plum metallic. It looks quite loosely woven, but it isn't as loose as I thought, although it has quite a bit of movement to it. I think it will need underlining, and possibly flannel might be a good choice.

I started laying it out and marking it this afternoon, and it quickly became apparent that it was going to be a bigger job than I had thought, since the pattern pieces are large because of the cut-on sleeves. I have to cut out single layer, so that makes the plaid matching a little trickier. I wish there were an easier way to mark than tailor tacks, but I think that's really the best method. I'm just going to have to wait until my back is in a little better shape to do all the bending over.

So, that gives me time to decide what to use for the contrast. I'm actually thinking fleece, or a lofty pile knit that I have in green. I don't want velvet, which is what is called for.

On the knitting front, I have my Instant Jacket almost all sewn together, and the collar almost done, so it is coming along.

It's going to be coat and jacket weather very soon, like maybe tonight! It's 48 right now, and it may snow a little in the next couple days. Oh, joy.

Friday, October 06, 2006

Knitting Again, Instantly


This is what I'm getting from the No Boundaries yarn I got from Wal-Mart. It's a beautifully suéded looking yarn, variegated in soft pinks and dark taupes with a little metallic thrown in. It's a little like a railroad ribbon yarn, but has much more body than most I've seen. I fell in love with it and bought all they had; 10 skeins.

I'm making an Instant Jacket. The pattern is from I'd Rather Be Knitting, and I'm sorry that I can't find a link to them. I've had the pattern for quite some time and used it once before. It makes a nice, simple cardigan, and best of all, it will work with the amount of yarn I have. This knits at 2 stitches/inch, so it goes really fast. I'm hoping I'll have enough yarn to add a collar, which would be cute I think.