I must admit that I was so nervous the first morning as I was getting ready, I felt almost ill. I was hoping the class would be what I wanted, that I would do well, or at least well enough not to be the class dud. I was also wondering what my classmates would be like. The workshop was open to students, and at a very good price, so I wondered if there would be a lot of students, and whether they would "look down" on those of us who might be self-taught (and old and un-hip, to boot.)
There were 10 students out of the 14 of us, a couple grad students and the rest undergrad, most of whom were going to be taking the beginning draping class with Dr. Trout in the fall, and wanted to get a jump on it. Everyone was very congenial, and very interested in getting down to the subject of the class. One of the undergrads was an art student who was interested in the subject. One grad student had an art degree and was returning in the fall for a design degree (or something) and her mother was with her. She was a longtime home sewer.
The other older participant had been the fashion illustrator for Hovland-Swanson, a very high-end women's clothing store where I worked while in college.
I mentioned that Dr. Robert Hillestad was in the workshop as well. He was such a charming, courtly individual, and Dr. Trout introduced him to everyone, saying that it was such an honor to have him in the class, as he had studied draping in Paris. He replied that this was an opportunity not to be missed. He is an emeritus professor, and I think former head of the department. The Textiles Gallery is named after him and he is very active in it. He was working on things for an exhibition he is scheduled to put on just about a year from now. The second day he brought in a bunch of things he's thinking of using in the display, such as painted silk lengths and garments and hats he'd made, mostly felt, with stitched crowns. All sizes up to about 4 feet in diameter. He had us put them on while he talked. He also had a wrap made of knitted "strings" with his "signature" tassels (these were made from rayon seam binding which was bleached and painted) and windchimes. It was really amazing. He made it for a show in Korea and hasn't displayed it anywhere else, so was thinking of using it for this.
Back to the class. The paper draping was first, with a yoke which began from 2 rectangles. One for the front, and one for the back. We learned how to pin to the form correctly, mark the pin points, copy the other half of the pattern after truing and marking the lines, and then repinning to the form, and doing "additive" draping. this is pretty self-explanatory, as you are adding pieces to it. Because the paper is not drapey at all, it's a little tough to get a real idea for what's going to happen. Only one person used the yoke-beginning to move onto a garment I believe, and she did a tabard-like piece that was very cute.
We then watched a demonstration of how to get a circle the width of your fabric, and began to drape our circle capes. We were shown how to make it closer fitting, how to place seams for various purposes, add slits and openings, etc. We then draped a straight piece onto the cape, to be a mandarin collar. Most of the circle capes didn't really appeal to me at all, but they were cute. I of course was approaching the class from a completely different point than most. They want to design for others, and I am more interested in what I want to make for myself. Also, I realized that most of the students really haven't done a lot of sewing, and so they were approaching the bound buttonhole and leather binding demonstration from a very different point. Various shapes that were obvious (I thought) were new to them as well.
One of the garments in the gallery show was a cape by Pauline Trigère. It began not with a circle, but with a triangle. A right triangle with the right angle at the CB hem was used. The straight grain was at CB, and as it moved around the body, the CF grain was true bias. The top of the point was cut off, and a large standing collar was allowed to form. She had added bound slits like welt pockets for the hands, with cuffs inserted, which looked almost like pants cuffs. It buttoned in the front.
A jacket by Madame Grés was shown during the slide presentation which was also a triangle, but instead of one which was allowed to fall down on the body, this one was placed at the waist and raised up to form the jacket, a waist-length, fairly fitted style with lapels and collar cut in one. The original was in doublecloth wool. The point of the triangle (snipped) was the waist, and the sleeve seam was along the shoulder and top of the arm. There was a cut on lapel/collar, and 2 tucks were taken under the sleeves to reduce bulk. It was a darling design, and Dr. Parsons had a muslin pattern she'd made of it. It was just fascinating to see all the different things, and where they start from.
Jean Parsons also showed us photos and eventually the garment she and another designer had made from digitally printed fabric. It began with a circle, which was slashed for the shoulder line and underarm line. Two of these circles were sewn together to form the garment. The top of the circle (above the shoulder line) was like a faced scarf collar. The side seams below the waist were unstitched, but did have an extra 1/2 circle inserted on each side of the front and back. This was in a lightweight printed silk, while the body was in a lightweight wool gabardine. It was an amazing garment, and I can see how it would be easy to become fixated on geometric designs and their possibilities. That's actually her research focus now, and she's going back through a lot of collections to see what basic shapes things began with. It's not always straightforward, and for instance, at the Met, although they allow scholars to see and photograph and annotate their collection, they are not allowed to touch anything, even with gloves. The staff will bring out the garment and they'll turn it as you wish, and measure between different points, but you absolutely cannot touch.
Dr Trout brought out a Chipmunk Coat for Dr Parsons to see. It's a donation, and the man who gave it says it's either a Cashin or a Trigère, but he's not sure which. It's actually just a lining, as it was a white wool swing coat with a button-out lining including a hood, made of chipmunk fur. It's a beautiful thing, but it had to take around 150 chipmunks! Apparently, both designers made coats of this description in the 1950's or 1960's, but there are no photos that help, and the lining doesn't have many distinctive details that would make it easy to tell. Quite the mystery.
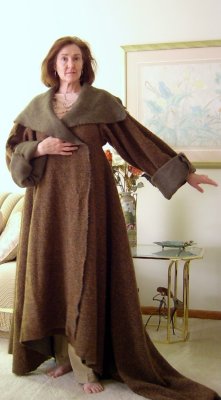
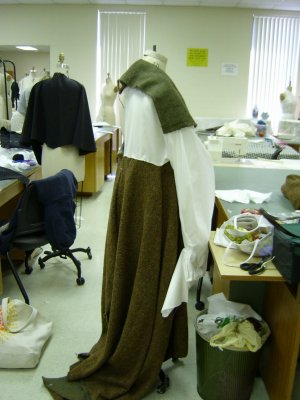
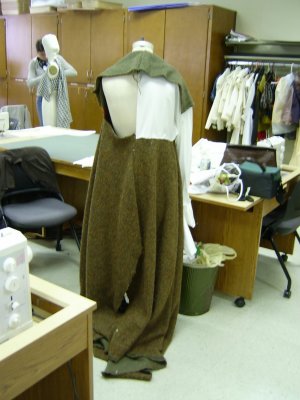
When we chose our fabrics, I knew I wanted to do a coat with the heavy, 2 sided fabric I chose, and I first draped muslin to get the collar and lapel shape I wanted, and to see how long a piece of fabric I should cut. One of the hardest things was marking the fabric, as nothing wanted to show up. I finally thread-marked with red thread, and even that blends into the right side pretty well.
One thing I was worried about by this point was whether I was going to get far enough while I had help and easy access to answers to my questions, that I would be able to finish up by myself. Cutting the armscye was kind of thrilling, and it was freehand. It appears to be very nice, though. One thing that has really saved me about this whole thing is that the fabric is extremely forgiving.
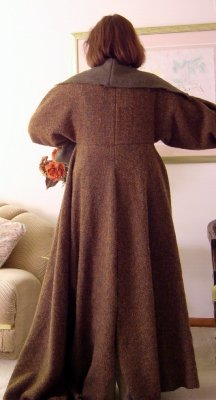
I did pin the back/sleeve piece in last night, and it actually works, and I tried it on (with only a little stabbing of myself in the process) and it's so much nicer than I thought it might be. It has a raised-waist look, and I think it has a somewhat Medieval feel to it. The front armscye seam looks so much more perfect than I had dared to hope, and the back is a kimono sleeve, so there's no seam, but the "waist" seam in the back looks nice and straight, and I'm just rather thrilled with the whole thing. Now to sew it together, figure out a nice seam finish for the inside, and I'm planning to do some kind of lining of the upper back and the sleeves to make it easier to get on and off.
I will have to figure out an edge finish, and I'm thinking binding, and possibly leather or Ultrasuede binding. I think a couple buttonholes will be necessary too, and right under the bust appears to be where they should go. It's a good thing I didn't have to split the fabric with anyone, as this took every bit of it.
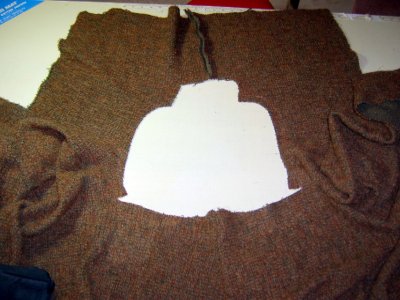 Photo Link
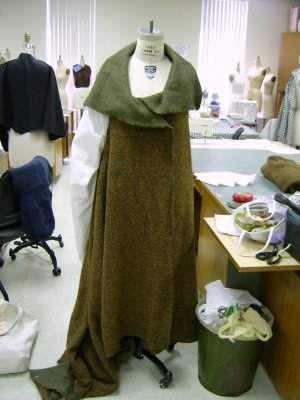
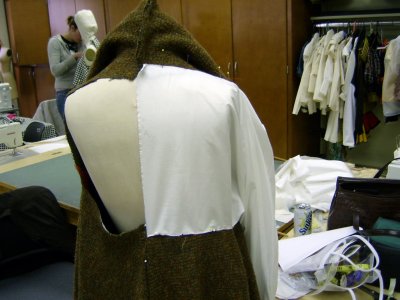
 Collar/Fronts/Lower Back ready for Upper Back/Sleeve insertion.
 Photo Link
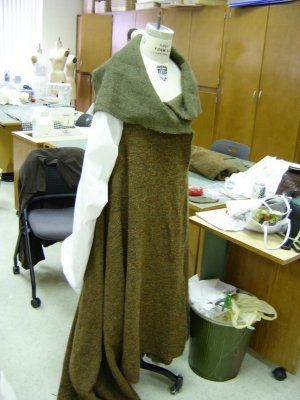
 Upper Back/Sleeve pattern muslin.
CB is at the bottom with neck at the left and waist at the right.
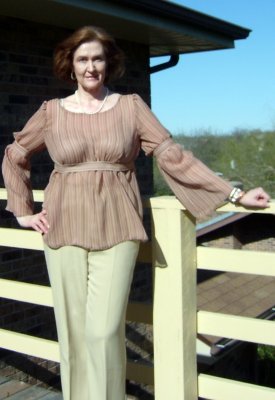 Photo Link
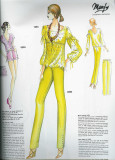 Photo Link
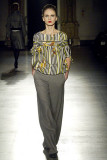 Photo Link
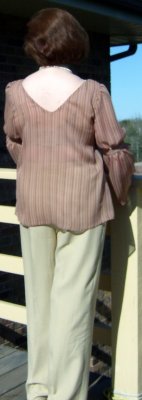 Photo Link