A couple years ago I did a Saran Wrap Block using instructions from Kathleen Fasanella of Fashion-Incubator fame. I highly recommend this if you want to draft your own patterns and need a sloper/block to start from, or if you want a guide to lay over commercial patterns to see how close they are to your shape. After you do the wrap, you grade up 2" to give you blouse wearing ease. Vicki asked if I had any tips on doing this, and someone else asked if I used the "pivot and slide" method, and I thought I'd post my responses here.
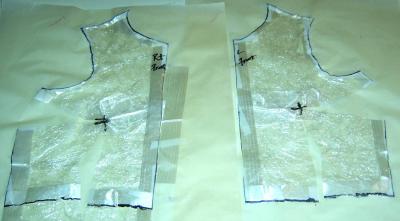
Photos of Saran Block pieces before and after grading up. All photos referred to in this section are in this gallery. Choose Original size below the photos to see in great detail.
You can get a good idea of what I did just by looking at the photos of the pattern pieces as I changed them. I did not pivot to grade up. When you grade something up, you are making the entire thing bigger, not just certain areas, so you don't want to pivot.
I added 1/2" at each side seam, both on the front and back pieces.
I added only 1/4" on the shoulder seam, as I didn't want the shoulders graded up as much.
I didn't add any at the CF or CB, as I didn't want to move the bust point or shoulder blade point.
If you look at the photos of my pattern with the 2" ease added, you can see where I marked 1/2" and an arrow to show which way I went on the corners. This was so I would remember what I did. I think I moved the lower armscye point down also. Grading should have the result gained from an "exploded" view of something. It should move out evenly in (almost) all directions. Think about how the saran wrap fit your body. That's how the ungraded pattern will make up. You probably don't want anything skin tight, so think of how you'd like a dressy blouse to fit. There would be ease around the body, and the armscye would be slightly dropped, for comfort. The shoulders could be extended slightly. You might want to add some lengthwise ease as well. That's what grading up the 2" should give you; a nice blouse-fit.
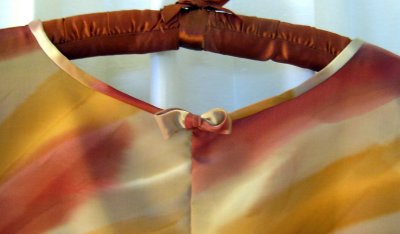
You'll have corrections and refinements when you make up your test muslin, and the blue line on my Master Pattern is my corrected armscye which is what I use for a sleeveless top. The armscye from the original saran wrap was more of what you'd use for a sleeve with a normally dropped armscye. Since very high-cut armscyes are "in" right now, that's what I wanted, especially for a sleeveless top, so this is actually cutting the armscye shallower. If you look at the lavender bodice I made from the 2" ease added pattern, you can see the ink line which shows the original saran armscye. (I drew around each piece with ink on my fabric, then cut on seam allowances.) I added seam allowances when I made this up, and I kind of liked where they hit me. That's what the blue line is. Look at the difference between the 5th and 7th photos, and you can see that the 7th was corrected to incorporate the blue line.
I did a review of the whole wrap process that you can read here.
New Question: Sally asked where I got my large rotary cutting mat. It's a Big Mat and I got it from The Sewing Emporium in Chula Vista, California. Their website isn't much, but I think you can call or email them. NAYY, but a very satisfied customer, and I bought mine at least 15 years ago, or more. There are lots of places that have the larger size mats available if you Google for them. I think if you're going to use a rotary cutter for garments, you absolutely must have a very large mat. Otherwise, you're just asking for grain problems.
Well, back to my floral top. It's stitched together, but I've decided it needs some serious embellishment. Not anything frou-frou, but it was looking extremely plain, and not in a good way. I've been playing with my scraps though, and ideas are percolating up.