Wednesday, November 30, 2005

Nikko Jacket is Done

Here's the finished Nikko Jacket. It's a Sewing Workshop pattern in a printed and embossed stretch cotton. I spent today finishing the sleeve hems, shoulder pads and closure, which I think turned out pretty nicely. The buttons are glass, from the Czech Republic, and extremely reflective; very similar to carnival glass, and so they are very difficult to photograph. I used 2, and a twisted cord to loop them together. The end of the cord has 2 much smaller glass buttons attached cuff-link style, for weight, and to give a finished look to the cord. You can see the grass stitch topstitching in the variegated rayon thread, which gives it a random effect, as the deep plum almost disappears into the fabric, while the silver is strongly contrasting, and it runs the gamut in between.

I may add a small snap or invisible button to the underlap of this jacket after it's recipient tries it. It would be impossible to pick the right spot for it before that. As it is now, there are some interesting folds that form above the closure, which I kind of like. Whether she will, is another thing.

You can see more photos of this jacket at
PBase.com, including detail photos. Click on any of the thumbnails to see larger photos, and use the Next and Previous buttons to navigate.

Fashion-Incubator: Saran wrap pattern making method #2

Fashion-Incubator: Saran wrap pattern making method #2

Kathleen just posted Part 2 this afternoon. Sounds like there may be a Part 3 which would entail making a pattern from the wrap. Otherwise, this is all the info in the originally published article, plus a little extra.

Monday, November 28, 2005

Thanksgiving Progress

I haven't done quite as much sewing this holiday weekend as I'd thought I might. My sister has been here for a week, and we like to spend as much time together as we can, while she's here. I did get the Nikko jacket together, facings understitched, and about half the topstitching done. The topstitching is extremely unhandy to do on this, as you really can't do it until you have the entire jacket together, and of course it would be much easier while it was still flat. One good thing about using the grass stitch rather than a straight stitch is that it's very easy, and quite undetectable to start and stop as necessary, even with the variegated thread.

I bought some glass buttons from the Czech Republic to use on the Nikko. They're hand made in molds that are around 100 years old, and the metal shanks are hand-placed before the glass cools. They look like carnival glass to me, and I tried to scan them, but they just look like blobs. They are very reflective; pink and green, but the pink really is beautiful with this fabric. I'm planning to use 2, with a tie of some sort to loop around them. I bought them at Sew Creative here. I know they're trying to post photos of them on their site, but I think they're having as much trouble as I did trying to photograph them. They hadn't given up though, so they may have them up at any time.

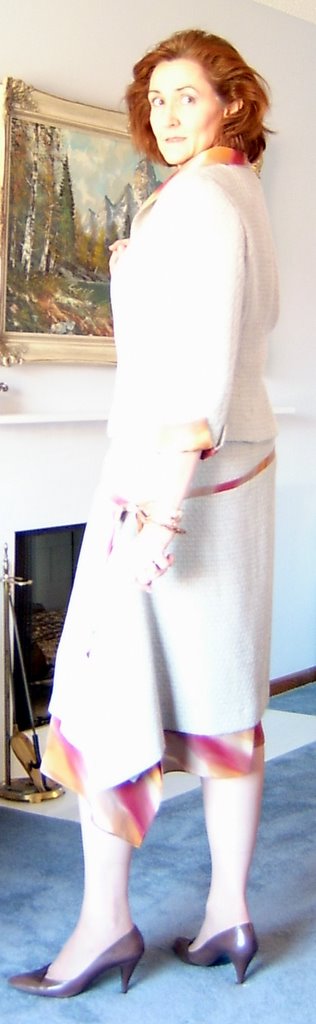
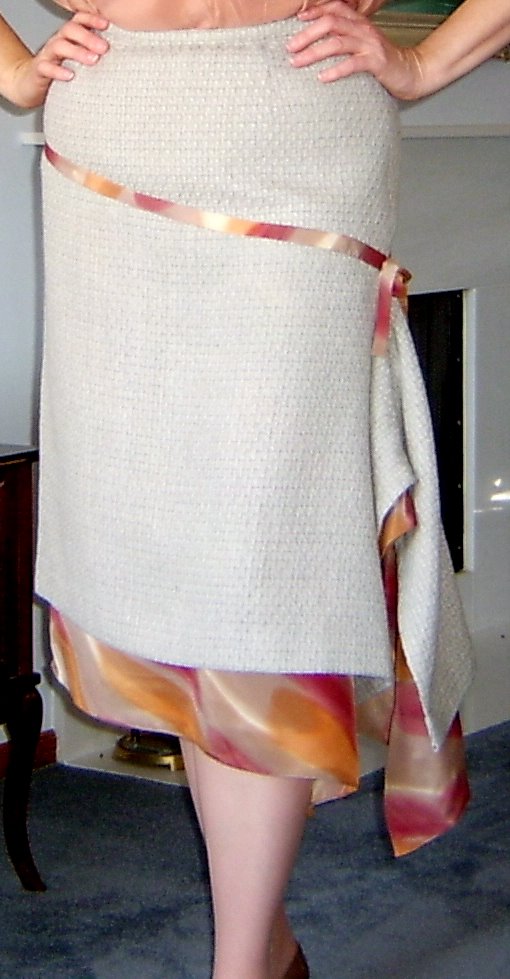
I also did some tricky mending this evening of a very fine-gauge machine knit skirt and top, also for my sister. They're a silk/rayon/nylon blend, and knit with a very interesting ribbed pattern. The skirt is quite long, and basically straight, except the top has much narrower ribbing, and more of it, than the bottom, where the ribs are quite widely spaced, and a little wider themselves. On this, the thread/yarn at the very bottom was failing in several spots. I think I did some fairly invisible darning, and I hope it will hold up for quite a while yet. The top is a more standard plain ribbed pattern, but perfect with the skirt rib graduation. It had just one place to fix. She leaves Tuesday, so I wanted to get them done, as the skirt especially is rather integral to her wardrobe. It's always a real problem when one of your major "foundation" pieces bites the dust. It throws all your clothing plans off the track, so I wanted to get them done before she went home.

The local Bernina store had a 25% off before 10am sale on Friday, so I went and bought some YLI silk thread. I've used Tire before, but there's no local dealer for it anymore, so thought I'd try the YLI before I order Tire from Things Japanese. Since taking the class from Linda Lee, I've become somewhat more convinced that sewing with silk thread is something I want to do more of.
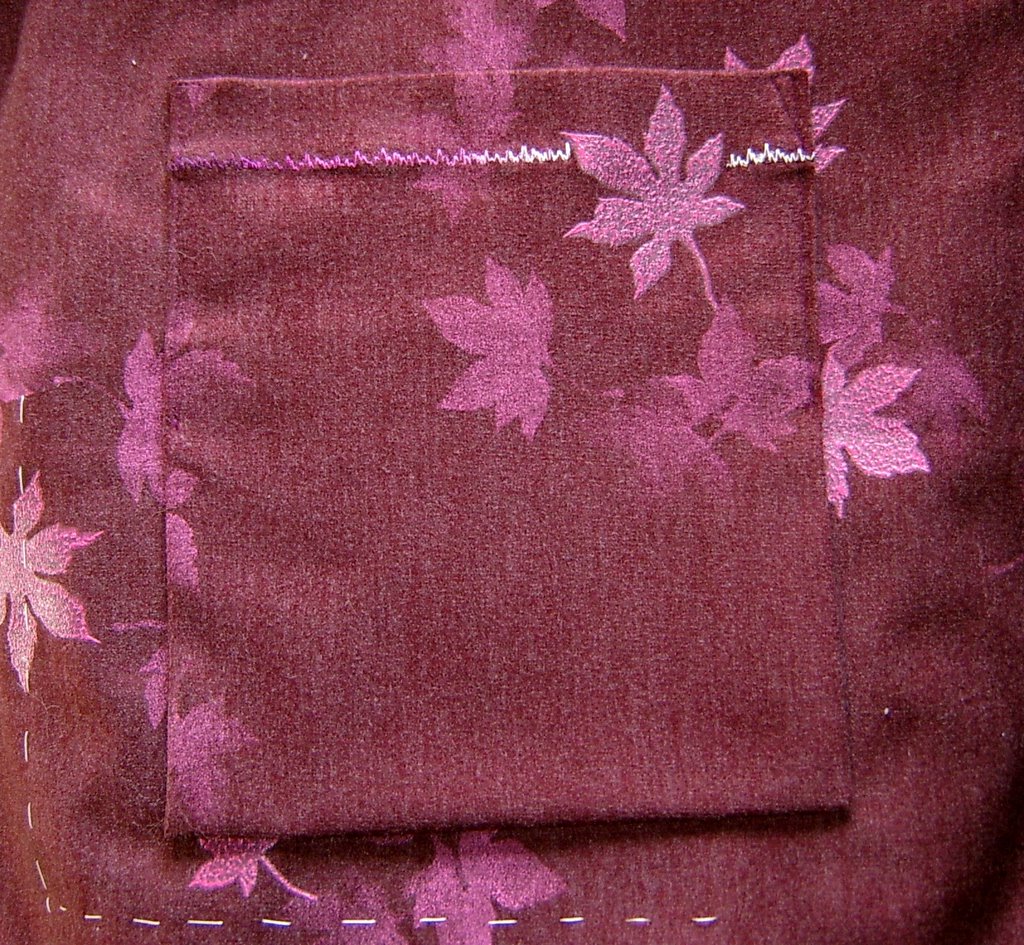
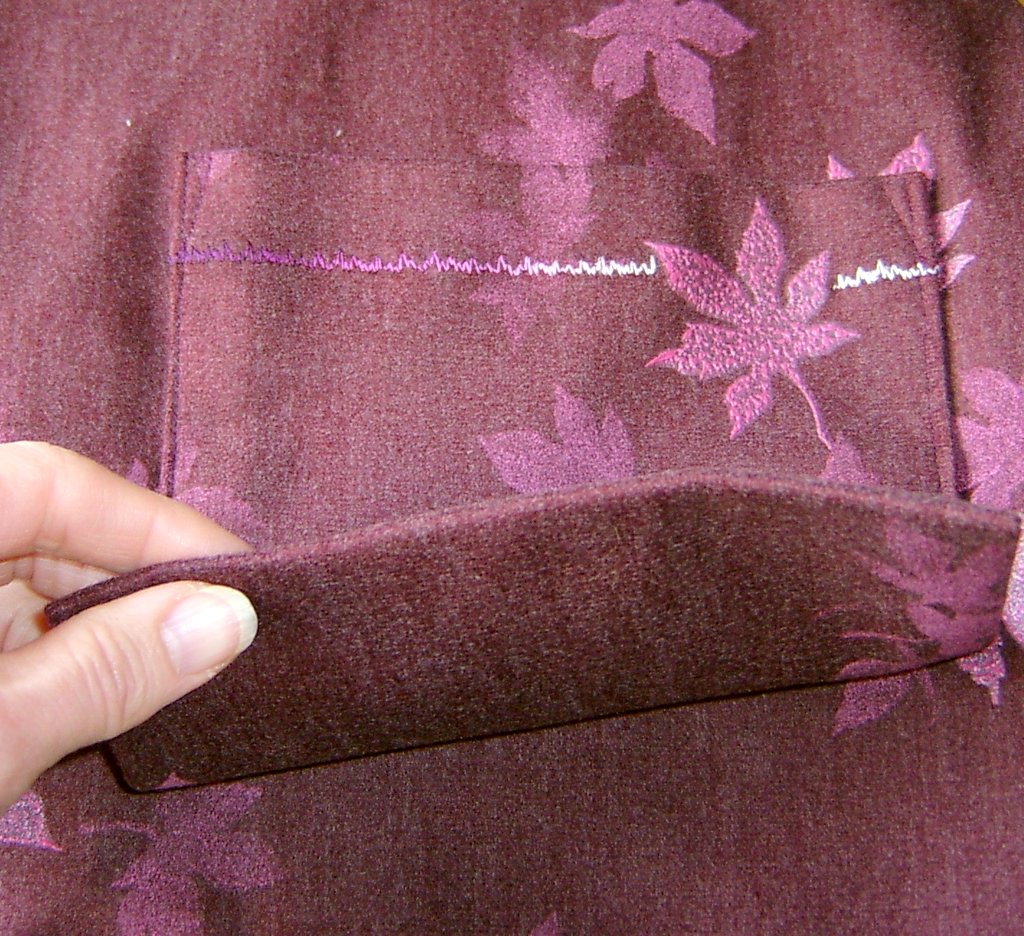
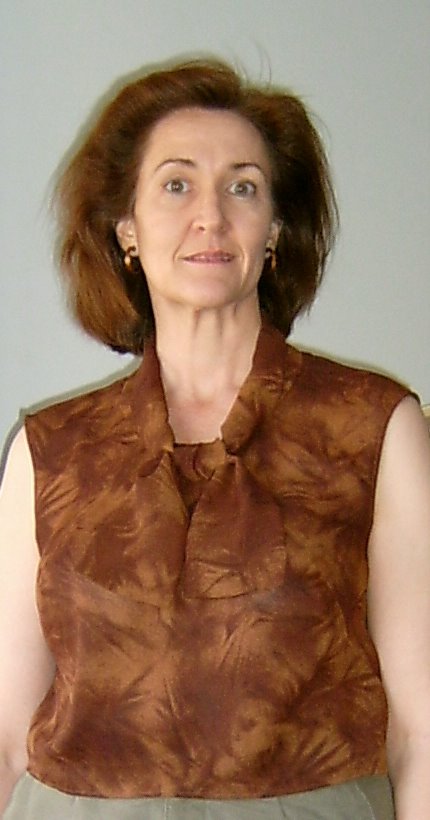
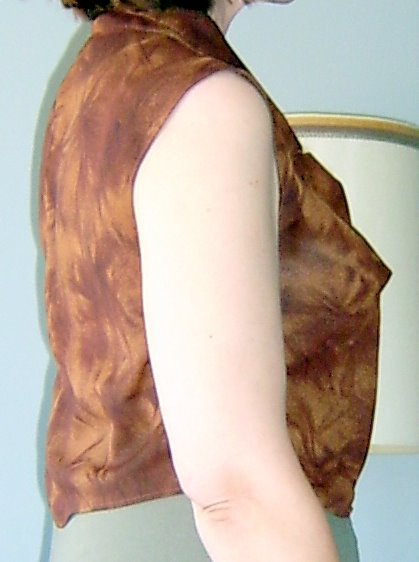
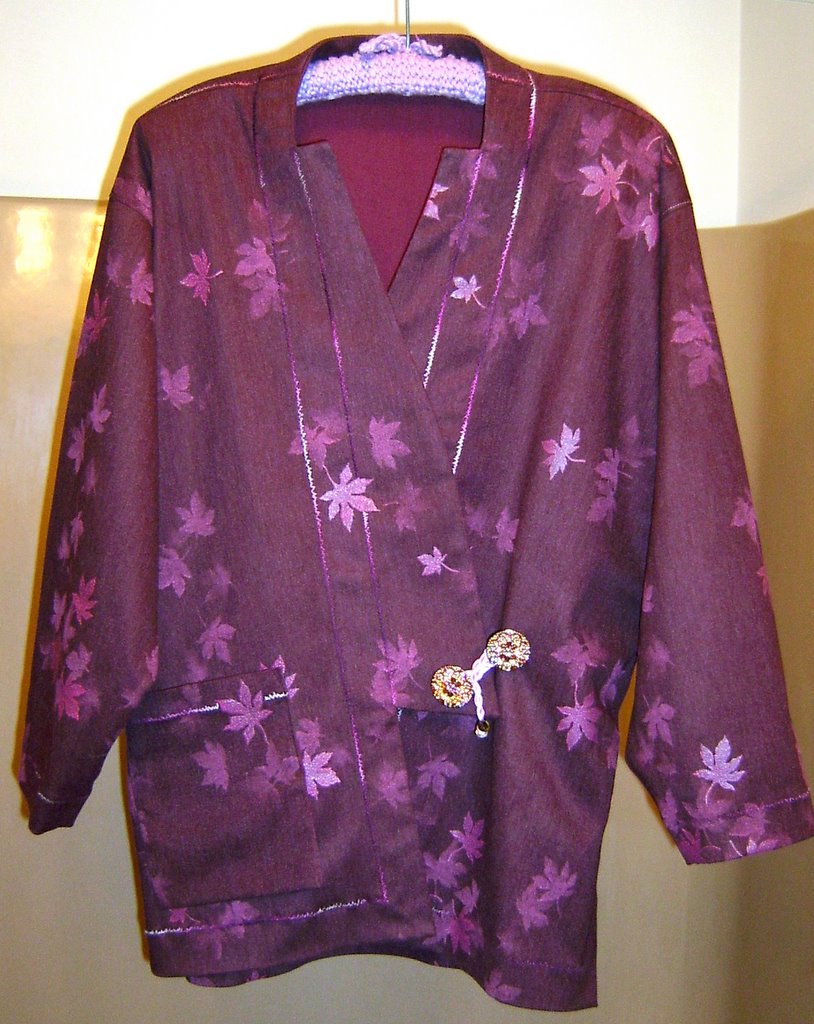
Tuesday, November 22, 2005

Hanging Pocket

Kathleen asked what I meant by "hanging pocket" and was it what is called a Bluff Pocket or Invisibly Stitched Pocket. No, I guess I just called this a hanging pocket all by myself, but it's really a patch pocket that is made with the fold at the bottom, and you attach the bottom layer at the top, a couple inches down from the pocket placement line, then attach the top of the pocket at the line, and stitch down the sides for only about 3", and it just hangs there. I haven't done a final press on this yet, but had a chance to take the photos in pretty decent light, so here they are.
Below is the pocket with the free-hanging bag portion lifted. There's really no purpose to this, and I would think if you put much in it, it would look pretty bad, but it's one of those "unique" details that Sewing Workshop likes to put in their patterns. I like some of them, and some of them seem to have a slightly make-work effect to them, to little purpose, but I think they are probably one of the real selling points of these patterns. If you like them, you like them.
 
 Posted by Picasa

You can see the embossed portion of the print on these photos, which I avoided with the topstitching on the hem edge of the pocket, and the variegated thread shows also, with the "grass stitch" I'm using for it.

Monday, November 21, 2005

Saran Wrap Block Part I

The Saran Wrap Patternmaking Method, Part I post is up on Fashion-Incubator. Here's your chance to get the directions, and either go right at it, or save them for future use. The rest should be posted very soon, I believe. Kathleen was so kind as to thank me for prompting her to post this, and I'm just glad she was willing to do so.

The Nikko jacket is coming along, and I'm beginning to quite like it. There really isn't a whole lot to the construction, but everyone tells me that you must follow the instructions exactly to get the desired results (what a surprise, but actually, for me it's a big change) so I'm checking and rechecking the steps instead of just forging ahead with what seems to naturally follow. I also find myself searching the instructions to find out whether they forgot a step that seems to need doing, and I have so far found that they haven't skipped anything; they just have a different order-of-work than I usually do. I'm following theirs, just in case it makes a big difference. Anyway, it's lovely fabric to work on, and once I get to where I'm pressing seams open, and they look so lovely and flat and perfect, it just makes it all seem very thrilling. Great mitering instructions and markings on this, too.

Sunday, November 20, 2005

Saran Wrap & Pockets

I added a link to the right side of this site, which will take you to Fashion-Incubator, a really great website which has many things to teach those of us who love sewing. Its subtitle is "Lessons from the Sustainable Factory Floor" which may sound pretty daunting, but Kathleen is an industry professional, a patternmaker, who has a fund of knowledge that she readily shares in the form of tutorials on zipper application, bagging a lining, and finishing the spot where the lining meets the front facing on a jacket (that's the Nameless Tutorial; no one seems to know anything printable to call that point!) among others. I asked her to please post her directions to do a Saran Wrap Block on the site, and she agreed not only to post them, but to update them as well! They should be up by Monday, so please do yourself a favor and get them, and/or some of the tutorials. Her posts are widely ranging, and always interesting.

I finally got down to it, and did the hanging patch pocket on the Nikko jacket this evening. It was a little tricky with the Cotton/Lycra fabric, as it wants to stretch instead of remaining nice and flat. Linen would really be ideal for this pattern, but I think this will be beautiful when it's done. I did the decorative topstitching on the top of the pocket, and plain on the sides.

Wednesday, November 16, 2005

Nikko Jacket Begun

I received this lovely printed and embossed cotton/Lycra fabric from EmmaOneSock today.
So, last night I cut out the Sewing Workshop Nikko Jacket I'm making as a Christmas gift. I think it's going to be very nice. Some of the print is embossed and it gives more depth to the design than a plain print would. I'm still deciding what kind of contrast I'll use. The recipient wears a lot of black, so that's one easy way out. I tested some interesting variegated threads that I may use for the topstitching. One is plums/violets/silver, and looks really pretty. I will have to find out if she wants it to be more matte, as it's a rayon thread, so there's a lot of shine. I'm thinking maybe some crumpled black or plum silk organza overlay on the pocket and/or facings, but maybe good old piping will be the final choice.

I also ordered some wonderful wool bouclé from EmmaOneSock that is a multicolor on a chocolate brown base, rather than the more usual black base. I snapped it up, and I'm glad I did, as she was sold out within about a day. I can't wait until it comes. I plan a jacket for me from it.

Monday, November 14, 2005

1st Finished Little Blouse - Brown TieDye

This is the finished Little Blouse. I consider it only the first of many. They will all be somewhat different I imagine, and I plan to scoop the neckline even further and make this my default tank top pattern. It will be great with a button front, and more of a V-neck. Pintucks would be nice also. There are so many cute blouse details, and I just needed a basic pattern to do them. I assume sleeves will be added sometime, too.
It has a little more scooped neck than the pink plaid muslin in the previous post, and of course the attached tie is different. I also left off the bias bottom band, since it would be almost invisible in this print, and just narrow-hemmed the bottom. The neckline and armscyes are faced with brown Seams-Great, and turned, then edgestitched.


In this side view, you can see how the CB seam follows the upper curve of my back. I stitched the top of the seam closed, since I was attaching the scarf, and the blouse will fit over my head anyway. The point you see in front is the tie end.

One thing I am very particular about on sleeveless garments is that they should have a very high armscye, with quite a bit of coverage. I hate it when the crease between the arm and body is visible on me. This shoulder is extended just slightly, and the armscye is cut for maximum coverage. This will be mainly worn under jackets or sweaters, and I think silk chiffon will be rather wonderful for this, or any soft fabric, preferably not polyester, although that's what this is. I felt I needed one more trial version before I cut into the good stuff.

Saturday, November 12, 2005

Testing the Little Blouse

I've thought for a long time that I need a "little blouse" to wear under jackets or in the summer by itself, and that I would like one made from my saran wrap block. Well, I finally took the plunge, and drafted a pattern yesterday. I made one trial version (muslin) and redid quite a few things. The second trial I finished last night, and it's not too bad. I used a pretty awful shiny, cheap woven that has absolutely no give, and a plaid pattern, so it was good for a trial, as I could see what was straight and what wasn't. I used the whole block, as the right and left are pretty different, and I wanted this to be fairly close fitting. The pattern looks pretty asymmetrical, but once I put it on, it appears even. Since this is just a trial, I just turned the neck and armholes under and stitched with seam binding. Here's the "finished" trial.


I will put a little more shape into the side seams on the next version, but in general, it's not too bad. I can change the neck shape anyway I like, and I'm thinking an attached scarf/cowl might be very nice too. There is a CB seam, and the top 4" or so is open, with a button and loop closure at the top. One thing I really like is that the CB seam follows my shape all the way up instead of sticking out at the top, as commercial patterns always do.

Friday, November 04, 2005

Resort Tweed Marfy Suit is Finished


I finished the jacket of my Resort Tweed suit on Thursday evening. I worked on it pretty steadily all day, and was able to finish at a decent hour. I found that a very old silk top I have is the perfect color, so I did not feel that I needed to hurry up and make a top from the printed silk to be able to wear this tomorrow. I am very pleased with this jacket, and with the entire ensemble. It's definitely a departure for me, but I really like it. Here's a side view, and another with the jacket open.

I like it that way too, and I think the hook and eye closures turned out to be a great thing. The lining is a taupe silk charmeuse that I got at the Linda Lee seminar in Omaha in October. It was the perfect color, and just what I needed after I decided not to line the entire jacket in the print.

I am pleased with the alterations I made to this pattern, compared with the first version, which is fine, but I think this tweed version is a little more fine-tuned. I have been thinking about this ensemble for over a year now, after deciding that what I wanted was silk print lapels/facings on a tweed jacket. This skirt pattern was not in my mind at all, but I think it worked out very well. I also think a yoked, pleated skirt would be nice. Plainer, and maybe a little more wearable, but this is not an everyday outfit, after all.

Thanks to Sandy and Joan who each very generously offered to let me take a little Resort Tweed off their hands, so I could make this ensemble I had been dreaming of. I actually got it done the same year I got the fabric! Pretty amazing. You can see more detail photos of the jacket here.

Tuesday, November 01, 2005

Marfy skirt is Done!

I finished the Resort Tweed Marfy skirt #9420 last night at about 1am.

I'm rather pleased with how it turned out. I fiddled with the waistband for quite a while last night, as it wanted to be too loose, and so I ended up shrinking and easing quite a bit of the skirt at both the CF and CB. I like the way the drape turned out, and the separate layers hang very nicely. I did a baby hem on the silk. This technique was demonstrated at the Linda Lee seminar I went to a couple weeks ago. How timely, and it made a very nice hem finish.

Here's the silk hem, with the tweed hem above it. The blue is just the couch under it.

I made a straight grain turned tube for the band at the yoke/panel seam. I was afraid I might have to use bias, but with the print, I really thought having it on the straight would give a prettier look. It worked just fine, and I finished it with a bow. I don't think that's too much, since I'm not having tassels on the skirt points. That would definitely be too much for me, anyway.

Here are a photo of the back of the skirt, and of the bow treatment. The line that shows at the CB of the yoke must be a shadow, as there's no CB seam, and no dark line either. Sorry it's a little washed out. The last photo is quite true to the colors.


I attached the flattened tube by hand with silk thread which just melted into the background.

I hope to be able to get the jacket done, as well as some kind of shell, as I'd like to wear this to a brunch/fashion show on Saturday. We'll see how this week goes.